Basic wound care for your pig
Wound care
This advice in no way replaces you vets recommendations. This is a simple guide for those who don't know how to properly dress a wound or for those needing emergent help.
Types of wounds damaging skin:
Abrasions
Lacerations
Punctures/Penetrating wounds
Burns
Abrasions are superficial and can be treated by washing with saline and water and treating the area with any first aid ointment or spray. Read your labels.
Lacerations. Treatment depends on severity. Minor to moderate can be treated by washing the area with saline and a sterile bandage. If you cannot control the bleeding or if deep, affecting inlaying tissues, go to a veterinarian.
Puncture/penetrating wounds. Damage to the surface and underlying tissues due to any foreign object. Animal bites should always been seen by a veterinarian due to a high risk/rate of infection. They should be treated as a puncture wound. 50% to 100% of bites end in some level of infection. In most cases, the opening needs to be enlarged for proper cleaning and healing. They should be kept open to heal from the deepest part up to the surface.
Burns can be topical or they can be invasive, meaning deep tissue. Sunburn is an example of a burn. This usually resolves on it’s own, but in some severe cases, a veterinarian’s intervention is required.
All wounds will cause inflammation. Remember, ice reduces inflammation, but this can prove to be impossible trying to use an icepack on a pig.
Levels of pain are relative to the area of the wound. Some areas such as the face have more nerve endings than a leg for example.
Amount of bleeding is relative to the area of the wound. Some areas such as the face have more blood vessels than others.
Some bleeding should be allowed as it will carry debris from the wound but should be stopped after about 15 seconds.
When should you seek medical care:
Wound treatment at home:
Severe wound care:
Wound dressings:
Aftercare:
Prognosis:
Written by Cat Drose
07/2015
This advice in no way replaces you vets recommendations. This is a simple guide for those who don't know how to properly dress a wound or for those needing emergent help.
Types of wounds damaging skin:
Abrasions
Lacerations
Punctures/Penetrating wounds
Burns
Abrasions are superficial and can be treated by washing with saline and water and treating the area with any first aid ointment or spray. Read your labels.
Lacerations. Treatment depends on severity. Minor to moderate can be treated by washing the area with saline and a sterile bandage. If you cannot control the bleeding or if deep, affecting inlaying tissues, go to a veterinarian.
Puncture/penetrating wounds. Damage to the surface and underlying tissues due to any foreign object. Animal bites should always been seen by a veterinarian due to a high risk/rate of infection. They should be treated as a puncture wound. 50% to 100% of bites end in some level of infection. In most cases, the opening needs to be enlarged for proper cleaning and healing. They should be kept open to heal from the deepest part up to the surface.
Burns can be topical or they can be invasive, meaning deep tissue. Sunburn is an example of a burn. This usually resolves on it’s own, but in some severe cases, a veterinarian’s intervention is required.
All wounds will cause inflammation. Remember, ice reduces inflammation, but this can prove to be impossible trying to use an icepack on a pig.
Levels of pain are relative to the area of the wound. Some areas such as the face have more nerve endings than a leg for example.
Amount of bleeding is relative to the area of the wound. Some areas such as the face have more blood vessels than others.
Some bleeding should be allowed as it will carry debris from the wound but should be stopped after about 15 seconds.
When should you seek medical care:
- Injury due to significant force or trauma as there may be further injuries such as broken bones or damaged muscles and ligaments
- When bleeding cannot be stopped with persistent pressure and/or elevation.
- If there is a possible need for sutures.
- If you cannot properly clean it yourself and sedation is required
Wound treatment at home:
- Abrasions – clean, antibacterial ointment, cover for 24 hrs.
- Bleeding – control with direct constant pressure. If the gauze/cloth soaks with blood replace with a clean gauze/cloth. Avoid touching the area with bare hands. Elevate area if possible. If Bleeding cannot be controlled within 10 minutes go to a veterinarian. There will be some oozing after major bleeding has stopped, This is normal.
- Cleaning –flush with room temperature tap water. Scrub gently if superficial. Deeper and more painful wounds should not be scrubbed. If from a bite, a wound wash such as a saline antibiotic/antimicrobial wash should be used. A solution of 3% hydrogen peroxide can be use. Do not use peroxide, iodine, Betadine, Mercurochrome or any such treatment full strength, if at all. It will damage the healthy tissue. All flushing should be done with a moderate amount of constant fluid pressure and should be continued until the wound is clean and has a bit of sheen to the tissues. A water pik makes a great irrigation device.
- If debris must be removed, go to a veterinarian.
- If any doubt to your ability to properly clean and care for a wound or to the extent of the injury, go to a veterinarian
Severe wound care:
- Clean and dress wound en route to veterinarian. Apply pressure to reduce bleeding. Avoid use of any antiseptic or antibiotic treatment as this will limit emergency care to be given.
- Have as many details as to cause and age of injury.
- Wounds that are more that 6 – 12 hours old most often do not get sutures.Very dirty wounds should not be sutured.
Wound dressings:
- Topical Antibiotics should only be used the first 48 hours as they will also kills the probiotics that promote proper healing.
- Prescribed antibiotics are generally a narrow spectrum and should be used as directed and until the full amount has been given.
- Read your labels. Many antibiotic ointments are not for use on open wounds.
Aftercare:
- Wound should remain moist. Do NOT use any antibacterial/antimicrobial ointments after 48 hours. To keep the wound moist use wound honey sold at most drug stores.
Prognosis:
- Dependent of injury, baseline health of animal, and after care.
- Watch for infection. This includes monitoring for a fever, sudden swelling of the area, “angry looking” skin or the area around the wound or the wound itself being hot to the touch. The wound area will become black with touches of yellow/green or sometimes other colors. There will be a very pronounced smell that you just know is “bad”. Any doubt, take your animal to the veterinarian. Infections can move to internal tissues bones, and organs causing a systemic infection called sepsis. Any doubt, take your animal to the veterinarian.
Written by Cat Drose
07/2015
Mini Pig Wound Care
Advanced wound care....
We use bandages for several reasons: to protect wounds from the environment, protect the environment from wounds, and to discourage a pet from licking or irritating a wound. Bandages may be applied as support for strains or sprains or to prevent motion. Proper application is important – an improperly applied or too-tight bandage can cause decreased blood flow and potential loss of the limb.
Cleaning the Wound
The process of bandaging begins with careful cleaning of the wound. All dried blood, dirt, and debris should be washed away using mild soap and lots of water. Hair should be clipped away so that it cannot lie in the wound. If possible, the area should be patted dry. You can do this by using a warm soapy cloth, maybe a bath or even using a 60cc syringe to squirt out any debris.
Materials Needed
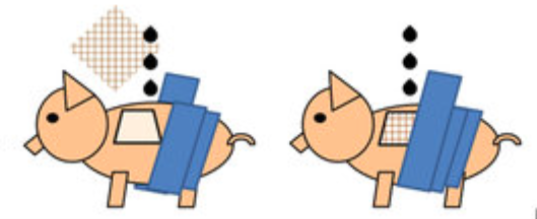
In an ideal setting, a bandage should have a contact layer, an absorbent layer, and an outer layer.
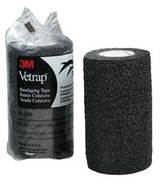
Antibiotic ointment, Telfa Non-Adherent Pad, cotton wrap, gauze wrap, and Vetrap of some kind. (These can be purchased at Tractor Supply Stores.) Paper tape can be used to secure the dressing in place, just take special precautions NOT to let that tape adhere to the skin of your pig. Once a wound starts to clot and heal, removing tape on a fresh wound can cause excessive bleeding and/or wound dehiscence which is what happens when a wound starts to open back up after treatment to close it.
The Contact Layer
After cleaning the wound, apply antibiotic ointment to the contact layer and use it first. Ideally, this layer should:
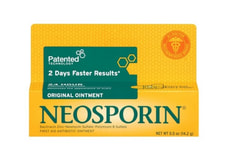
It is desirable to apply an antibiotic ointment, such as Neosporin, to the pad but this is not absolutely necessary. Frequent bandage changes are more important. After cleaning the wound, place a new contact layer over the wound.
The Absorbent Layer
After the contact layer is in place, apply the second (absorbent) layer to hold the contact layer snugly, but not tightly, over the wound. This layer is usually a cotton or Dacron material that comes in various widths. Generally, 1-inch rolls are used for small limbs and the tail; 2-inch rolls are for medium-sized legs; and the 3- and 4-inch rolls are for large legs and the body. It is important to use the proper size. Materials that are too narrow often cause a tourniquet effect, especially if the wound causes swelling.
If materials are too wide, they are difficult to apply smoothly. Any wrinkles or ridges may cause the bandage to become uncomfortable for your pet. Uneven pressure may cause necrosis (tissue death) of the underlying tissues.
Begin with just enough of an absorbent layer to hold the contact layer in place. If the wound is on a leg or the tail, wrap from the toes or the tip of the tail towards the body. If you begin at the top of the leg or the tail, the bandage is more likely to restrict blood flow and cause swelling, which may cause tissue damage. Apply several layers of absorbent material, which will soak up the fluid from the wound and increase the patient's comfort by cushioning the wound.
Make sure the material you use as the absorbent layer is the proper width, and wrap from the toes or tail tip up towards the body.
Gauze wrap can be applied next to hold the cotton wrap in place and to add extra support. (This step can be skipped for small wounds or for temporary bandages.)
The Outer Layer
Finally, apply the outer (third) layer, usually made up of porous adhesive tape or elastic tape (i.e., Elastikon, Vetrap). Wrapped from the toes up towards the body, this layer should also be smooth and snug. Do not stretch elastic tapes to their limits as this will interfere with circulation and result in bandage failure. It helps to unwrap the Vetrap or Elastikon first and then rewind it to remove the tension from the wrap before placing.
The tape should be in contact with the skin (hair) at the bandage margins, anchoring the bandage so it will not slip.
The outer layer of a bandage should be applied smoothly and snugly, but not tight enough to cut off blood circulation.
After cleaning the wound, apply antibiotic ointment to the contact layer and use it first. Ideally, this layer should:
- Be sterile and inert.
- Stay in close contact with, but not stick to, the wound.
- Be very absorbent.
- Be free of particles or fibers that might shed into the wound.
- Conform to all shapes.
- Allow drainage to pass to the next layer without becoming wet.
- Minimize pain.
It is desirable to apply an antibiotic ointment, such as Neosporin, to the pad but this is not absolutely necessary. Frequent bandage changes are more important. After cleaning the wound, place a new contact layer over the wound.
The Absorbent Layer
After the contact layer is in place, apply the second (absorbent) layer to hold the contact layer snugly, but not tightly, over the wound. This layer is usually a cotton or Dacron material that comes in various widths. Generally, 1-inch rolls are used for small limbs and the tail; 2-inch rolls are for medium-sized legs; and the 3- and 4-inch rolls are for large legs and the body. It is important to use the proper size. Materials that are too narrow often cause a tourniquet effect, especially if the wound causes swelling.
If materials are too wide, they are difficult to apply smoothly. Any wrinkles or ridges may cause the bandage to become uncomfortable for your pet. Uneven pressure may cause necrosis (tissue death) of the underlying tissues.
Begin with just enough of an absorbent layer to hold the contact layer in place. If the wound is on a leg or the tail, wrap from the toes or the tip of the tail towards the body. If you begin at the top of the leg or the tail, the bandage is more likely to restrict blood flow and cause swelling, which may cause tissue damage. Apply several layers of absorbent material, which will soak up the fluid from the wound and increase the patient's comfort by cushioning the wound.
Make sure the material you use as the absorbent layer is the proper width, and wrap from the toes or tail tip up towards the body.
Gauze wrap can be applied next to hold the cotton wrap in place and to add extra support. (This step can be skipped for small wounds or for temporary bandages.)
The Outer Layer
Finally, apply the outer (third) layer, usually made up of porous adhesive tape or elastic tape (i.e., Elastikon, Vetrap). Wrapped from the toes up towards the body, this layer should also be smooth and snug. Do not stretch elastic tapes to their limits as this will interfere with circulation and result in bandage failure. It helps to unwrap the Vetrap or Elastikon first and then rewind it to remove the tension from the wrap before placing.
The tape should be in contact with the skin (hair) at the bandage margins, anchoring the bandage so it will not slip.
The outer layer of a bandage should be applied smoothly and snugly, but not tight enough to cut off blood circulation.
Bandage Changes
Bandages should be checked frequently for any signs of swelling, skin discoloration or coolness, odor, or saturation of the bandage material.
The bandage should be changed whenever any of the above are noticed or any time it appears to be uncomfortable for the pet. Wounds that are draining heavily may require bandage changes every 1 or 2 hours. Bandages over wounds with little or no drainage should be changed every 24 hours.

